> ## Documentation Index
> Fetch the complete documentation index at: https://developer.box.com/llms.txt
> Use this file to discover all available pages before exploring further.
# Setup with JWT
export const SignupCTA = ({children}) => {
return
;
};
export const Link = ({href, children, className, ...props}) => {
const localizedHref = localizeLink(href);
return
{children}
;
};
A Platform App can be set up to use server-side authentication with
JWT.
## Prerequisites
To set up a Platform App using server-side authentication, you need to ensure
you have access the [Developer Console][devconsole] from your Box enterprise
account. Alternatively, you may sign up for a [developer account][devaccount].
Don't have a Box account yet? A free developer account gives you access to the Developer Console, where you can create and configure JWT applications.
## App creation steps
### Navigate to the Developer Console
Log into Box and go to the [Developer Console][devconsole].
Select **Platform Apps**, then click **New App**.
### Create a new app
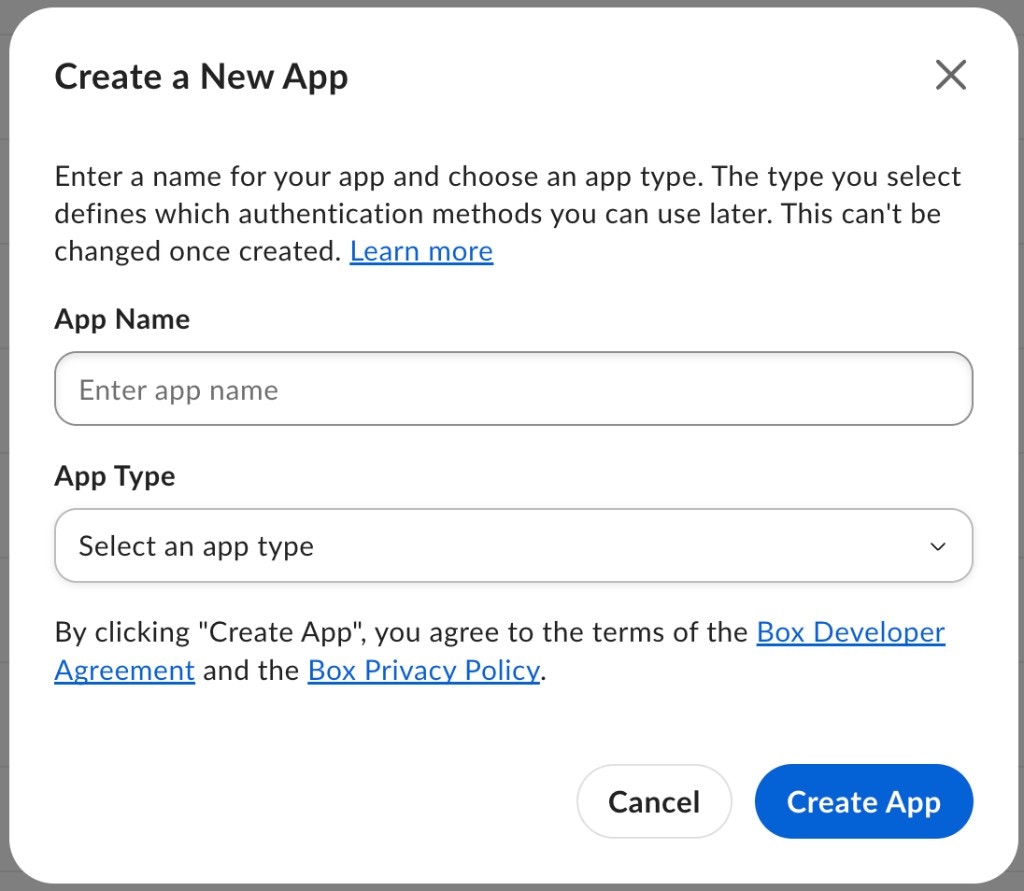
On the **Create a New App** screen, enter your app name
and select **Server Auth - JWT** from the **App Type** dropdown.
Once you make a selection, you are not able to change to a different
authentication method without creating a new application.
## Public and private key pair
This section can be skipped if you selected Server Authentication
(Client Credentials Grant) as your authentication method.
Once a Platform App is created leveraging Server Authentication with JWT, a key
pair can be generated via the configuration tab within the
[Developer Console][devconsole]. Alternatively, you can generate your
own and supply Box with the public key. Regardless of the method you select,
your Box account needs to have [2FA][2fa] enabled for security purposes.
### Generate a keypair (Recommended)
If you would like to use a Box generated keypair, navigate to the
[Developer Console][devconsole] where you can generate a configuration file.
This file includes a public/private keypair and a number of other application
details that are necessary for authentication.
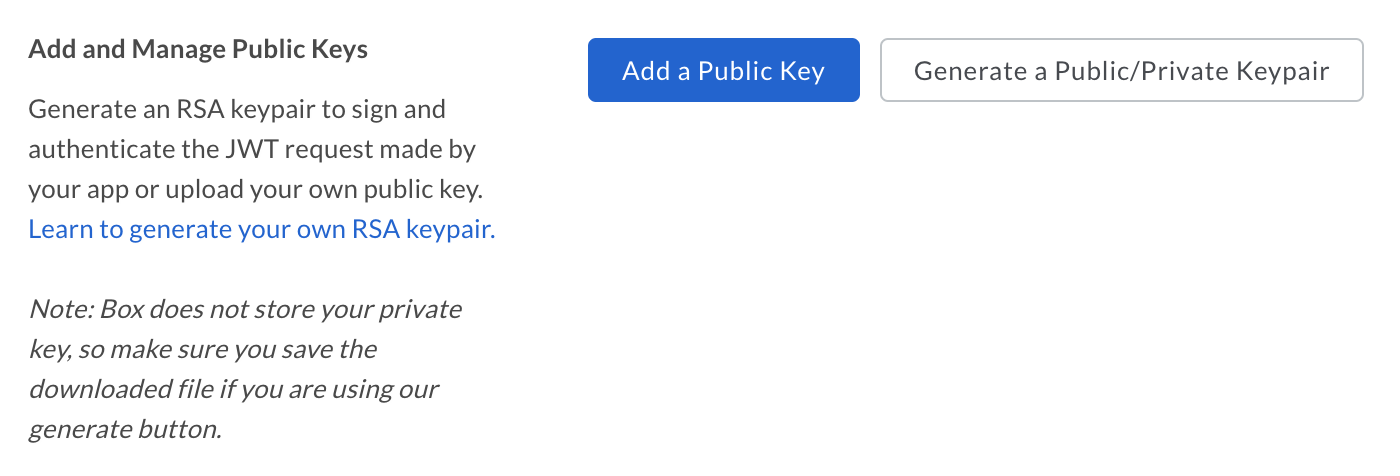
To generate this file, navigate to the **Configuration** tab of the
[Developer Console][devconsole] and scroll down to the
**Add and Manage Public Keys** section.
Click the **Generate a Public/Private Keypair** button to have Box generate a
keypair you. This triggers the download of a JSON configuration file that
you can move to your application code.
For security reasons, Box does not store your private key. If you lose your
private key, you need to reset the entire keypair.
### Manually add keypair
Alternatively, you may generate your own keypair and upload the public key to
the [Developer Console][devconsole].
To create a keypair using OpenSSL, open a terminal window and run the
following commands.
```shell theme={null}
openssl genrsa -des3 -out private.pem 2048
openssl rsa -in private.pem -outform PEM -pubout -out public.pem
```
**For Windows Systems**
Windows users can install and use the [Cygwin][cygwin] package to run OpenSSL.
Then, navigate to the configuration tab for your application within the
[Developer console][devconsole] and scroll down to the
**Add and Manage Public Keys** section.
Click the **Add a Public Key** button, enter the public key generated using the
steps above and click **Verify and Save**.
## App Authorization
Before the application can be used, a Box Admin or Co-Admin needs to authorize it.
On the **Configuration** tab in the [Developer Console][devconsole]:
* If you are a Box Admin or Co-Admin, click **Authorize** to authorize the app immediately.
* If you are not an Admin or Co-Admin, click **Submit** to send an authorization request to your Admin or Co-Admin. You receive an email once the request is approved or denied.
More information on this process is available in our
[support article for app authorization][app-auth].
## Basic configuration
### Application Access
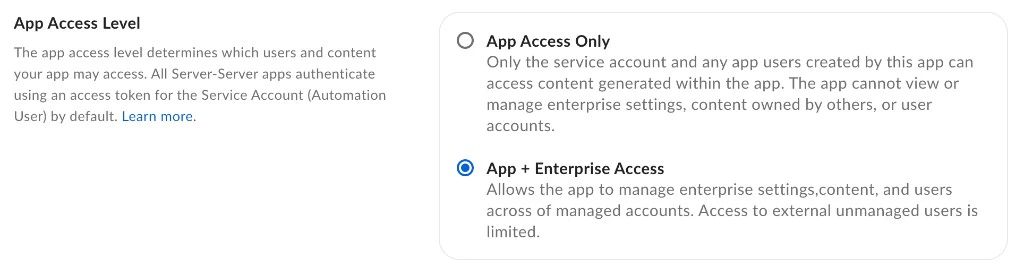
An application's access level determines which users and content your app may
access. By default, an application can only successfully interact with the
content of its Service Account and any App Users.
To access existing Managed Users of an
enterprise and groups that were not created by
the app itself, navigate to the **App Access Level**
setting accessible on the **Configuration** tab of the
[Developer console][devconsole] and set
to **App + Enterprise Access**. Otherwise, access to such
Managed Users and groups is blocked.
### Application Scopes
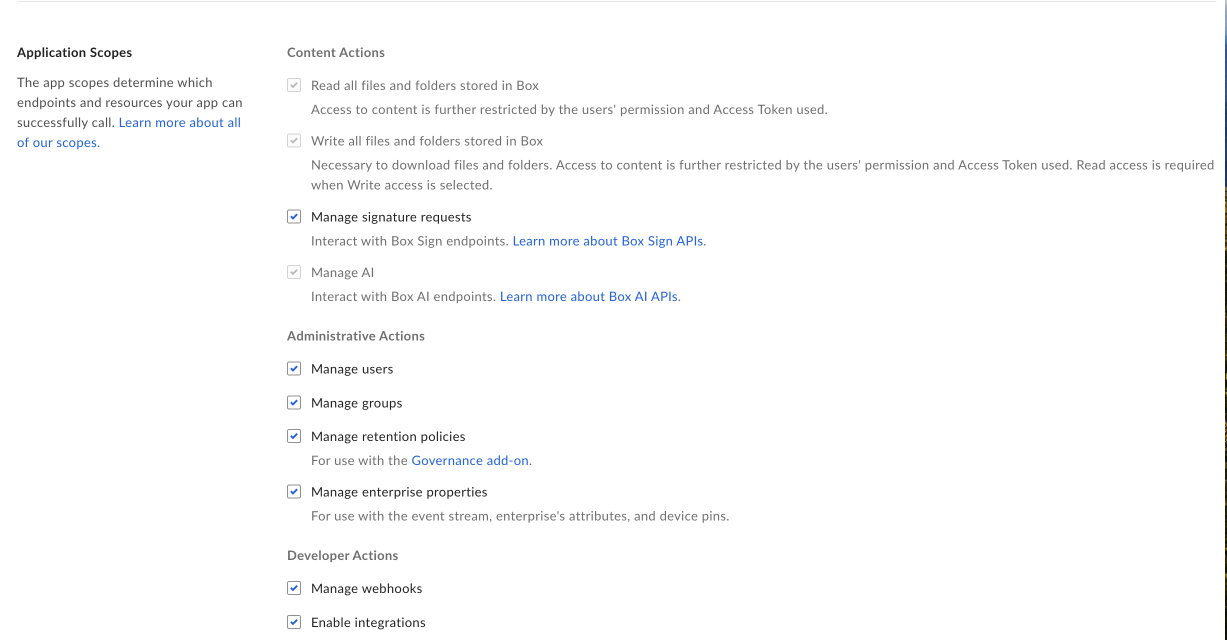
An application's scopes determine which endpoints and resources an application
can successfully call. See the scopes guide for detailed information
on each option.
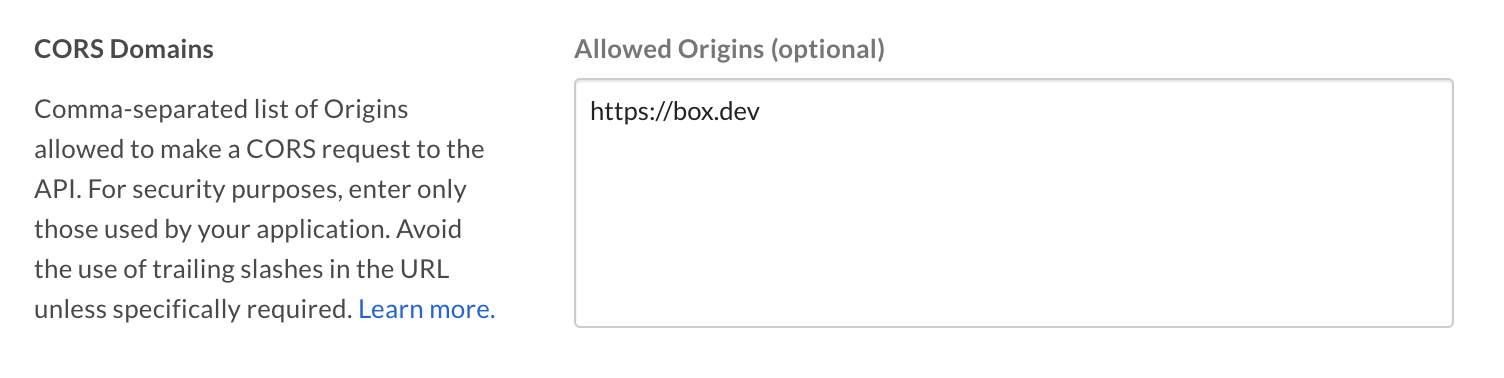
### CORS Domains
If your application makes API calls from front-end browser code in
Javascript, the domain that these calls are made from needs to be
added to an allow-list due to [Cross Origin Resource Sharing][cors],
also known as CORS. If all requests are made from server-side code,
you may skip this section.
To add the full URI(s) to the allow-list, navigate to the **CORS Domain**
section at the bottom of the **Configuration** tab in the
[Developer console][devconsole].
[devconsole]: https://app.box.com/developers/console
[devaccount]: https://account.box.com/signup/n/developer
[devtoken]: /guides/authentication/tokens/developer-tokens
[cors]: https://en.wikipedia.org/wiki/Cross-origin_resource_sharing
{/* i18n-enable localize-links */}
[cygwin]: http://www.cygwin.com/
[app-auth]: https://support.box.com/hc/en-us/articles/360043697174-Authorizing-Apps-in-the-Box-App-Approval-Process
{/* i18n-enable localize-links */}
[2fa]: https://support.box.com/hc/en-us/articles/360043697154-Two-Factor-Authentication-Set-Up-for-Your-Account
[ccg]: /guides/authentication/jwt/without-sdk/#client-credentials-grant
 Click the **Generate a Public/Private Keypair** button to have Box generate a
keypair you. This triggers the download of a JSON configuration file that
you can move to your application code.
Click the **Generate a Public/Private Keypair** button to have Box generate a
keypair you. This triggers the download of a JSON configuration file that
you can move to your application code.
 ### Application Scopes
An application's scopes determine which endpoints and resources an application
can successfully call. See the scopes guide for detailed information
on each option.
### Application Scopes
An application's scopes determine which endpoints and resources an application
can successfully call. See the scopes guide for detailed information
on each option.
 ### CORS Domains
If your application makes API calls from front-end browser code in
Javascript, the domain that these calls are made from needs to be
added to an allow-list due to [Cross Origin Resource Sharing][cors],
also known as CORS. If all requests are made from server-side code,
you may skip this section.
To add the full URI(s) to the allow-list, navigate to the **CORS Domain**
section at the bottom of the **Configuration** tab in the
[Developer console][devconsole].
### CORS Domains
If your application makes API calls from front-end browser code in
Javascript, the domain that these calls are made from needs to be
added to an allow-list due to [Cross Origin Resource Sharing][cors],
also known as CORS. If all requests are made from server-side code,
you may skip this section.
To add the full URI(s) to the allow-list, navigate to the **CORS Domain**
section at the bottom of the **Configuration** tab in the
[Developer console][devconsole].
 [devconsole]: https://app.box.com/developers/console
[devaccount]: https://account.box.com/signup/n/developer
[devtoken]: /guides/authentication/tokens/developer-tokens
[cors]: https://en.wikipedia.org/wiki/Cross-origin_resource_sharing
{/* i18n-enable localize-links */}
[cygwin]: http://www.cygwin.com/
[app-auth]: https://support.box.com/hc/en-us/articles/360043697174-Authorizing-Apps-in-the-Box-App-Approval-Process
{/* i18n-enable localize-links */}
[2fa]: https://support.box.com/hc/en-us/articles/360043697154-Two-Factor-Authentication-Set-Up-for-Your-Account
[ccg]: /guides/authentication/jwt/without-sdk/#client-credentials-grant
[devconsole]: https://app.box.com/developers/console
[devaccount]: https://account.box.com/signup/n/developer
[devtoken]: /guides/authentication/tokens/developer-tokens
[cors]: https://en.wikipedia.org/wiki/Cross-origin_resource_sharing
{/* i18n-enable localize-links */}
[cygwin]: http://www.cygwin.com/
[app-auth]: https://support.box.com/hc/en-us/articles/360043697174-Authorizing-Apps-in-the-Box-App-Approval-Process
{/* i18n-enable localize-links */}
[2fa]: https://support.box.com/hc/en-us/articles/360043697154-Two-Factor-Authentication-Set-Up-for-Your-Account
[ccg]: /guides/authentication/jwt/without-sdk/#client-credentials-grant